Thursday, October 24, 2019
THE MAKING OF MONSTERS

Halloween is fast approaching. The time of Ghouls, Goblins, and Monsters. Here is a peek into the artistic mind and talent of PPOC Photographer Brent McCombs, as he goes about creating several B-Movie Monsters.
A few years ago a local makeup artist I had worked with in the past (Elle), approached me on a photography series to show off her creative skills. Known in Halifax primarily for her beauty and wedding makeup ability, she wanted to show off more intricate fantasy makeup skills, with an eye toward getting more work in film. As a huge fan of 1950s-60s style B-Movie monsters, Elle wanted to do a series of 4 monsters. She had settled on the most traditional/well known four characters - Wolfman; Dracula; the Mummy and Frankenstein. If we had time, she’d also like to do a fifth image, namely the Creature from the Black Lagoon, but she wasn’t sure about doing that makeup. She also wanted to shoot in a bog/swamp, and she didn’t know if we could make that happen, particularly given the cold temperatures, as we were at the beginning of October in Nova Scotia.
As the series intent was to show off Elle’s makeup skills, I told her I’d agree to do the series on one condition - that we could do NO POST WORK to the images. We had to get the images right in camera, so that when she showed them to clients, she could legitimately claim there was no Photoshop on the makeup. I asked for this because it always bothers me when I review images from makeup artists and can’t tell what is their work, versus what has been ‘fixed’ after the fact by the photographer. Additionally, as this was going to be a rather involved project time-wise, I didn’t want to commit even more time to working on the files at home. So she agreed that we’d take the time needed in studio to get the shots right in camera, and just go with what we could achieve. This approach also fit well with the basic nature of ‘B-Movie’ creation, and would allow us to get the images shot and posted to social media before Halloween.
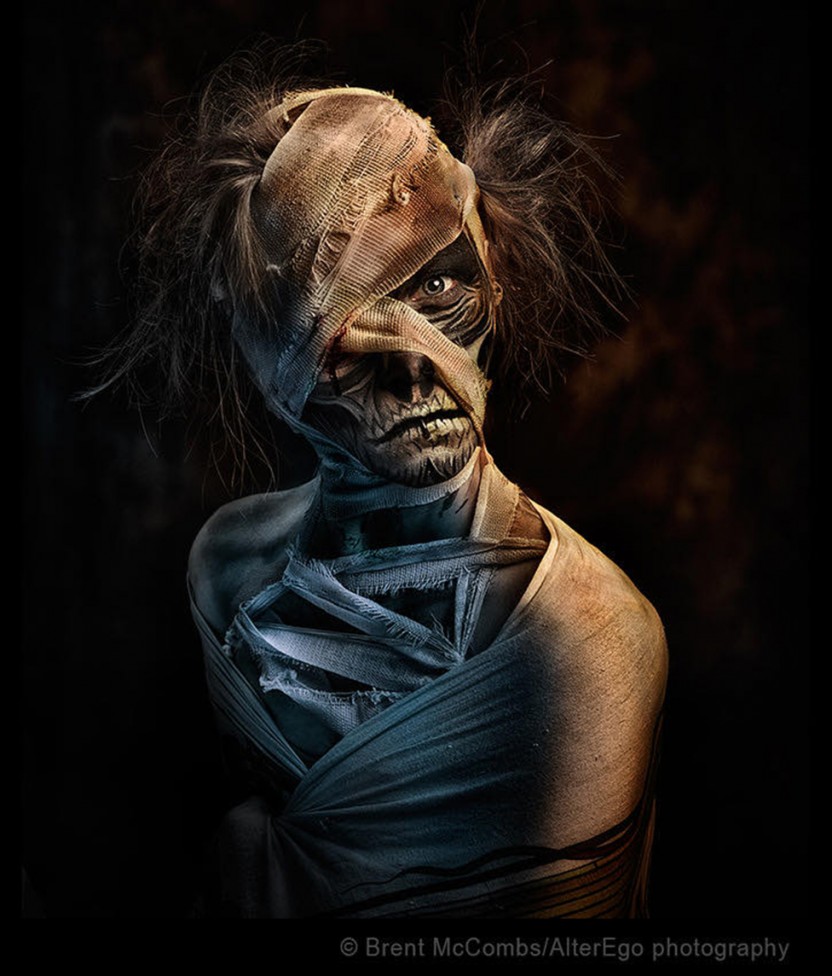
Our initial discussions happened around October 10th, and we went to camera for our first shoot on October 19th. I had 8 free days that month (not including night-time event shoots) and so we blocked them all out, not knowing how long we’d need. We shot the first four images over five days. I’ve never been thrilled with the Wolfman or Dracula shots, but after that, we got in our groove. The Mummy was a simple 2 light set up with gels (warm light hinting at a torch, cool light hinting at darkness, and hinged on getting our model to give us a really great face. It took nearly 200 shots (a huge number for me) because our model kept laughing and giggling. Kelly is a gorgeous fine art model, a tiny gentle soul, and someone with a personal interest in Egypt, but she’d not done a lot of fantasy character work. She was having a hard time looking menacing and evil. It was only when I resorted to truth telling (something I rarely do when shoots aren’t working) did we get the shot. “This isn’t working. I think Kelly may be the wrong model. She can’t pull off angry…” that type of thing - all honest observations, but death to most shoots. Luckily, in this unique case, it was exactly death that I was hoping for, and by the forth of fifth ‘truth’, Kelly gave me the death-stare I needed. We still get along.
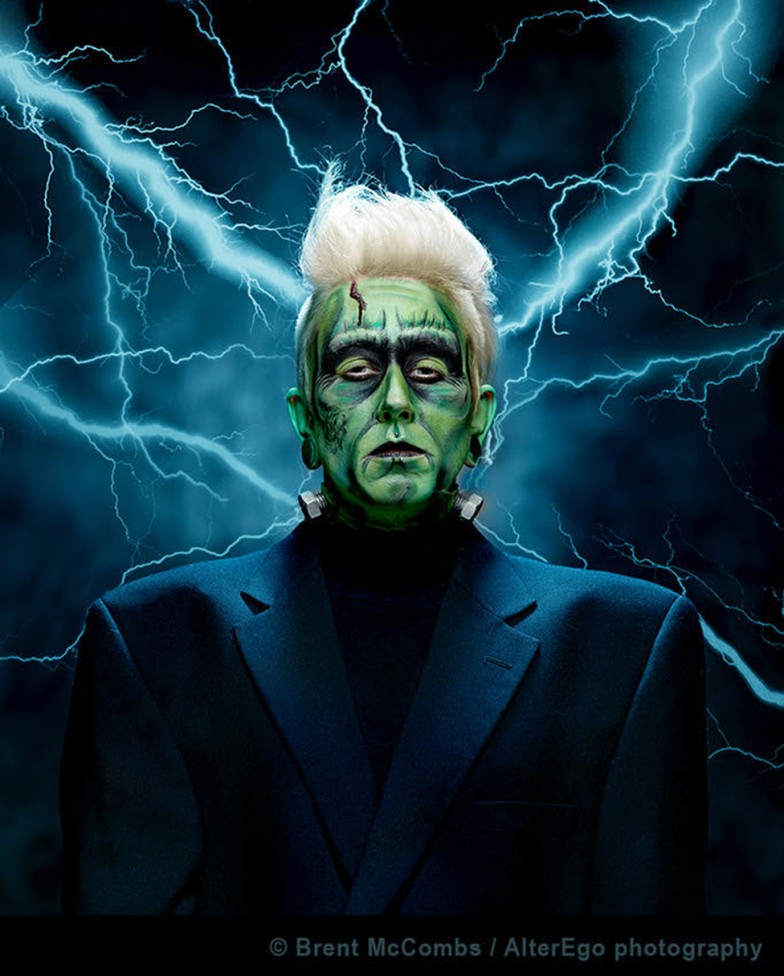
Next up was our Frankenstein, and it was a pretty straightforward beauty light shot (beauty dish front/high). Most of the "heaving lifting" being done by Elle, her makeup, and our model who out-of-makeup you would never believe could pass for a (sexy?) Frankenstein. It was this fourth image of Frankenstein where I had my first "photoshop dilemma". The image looked pretty stale out of camera, and knowing the original Frankenstein story, I immediately knew it needed lightning. I had no way to re-create lighting in the studio on the spot, so I made the concession of adding lighting strikes in post editing. I used a quickly sourced YouTube tutorial to make the bolts and drop them in, rationalizing this concession by the fact that none of the post edit was on the actual model, so it didn’t count. Heh - we photographers can get good at rationalizing when we need to be.

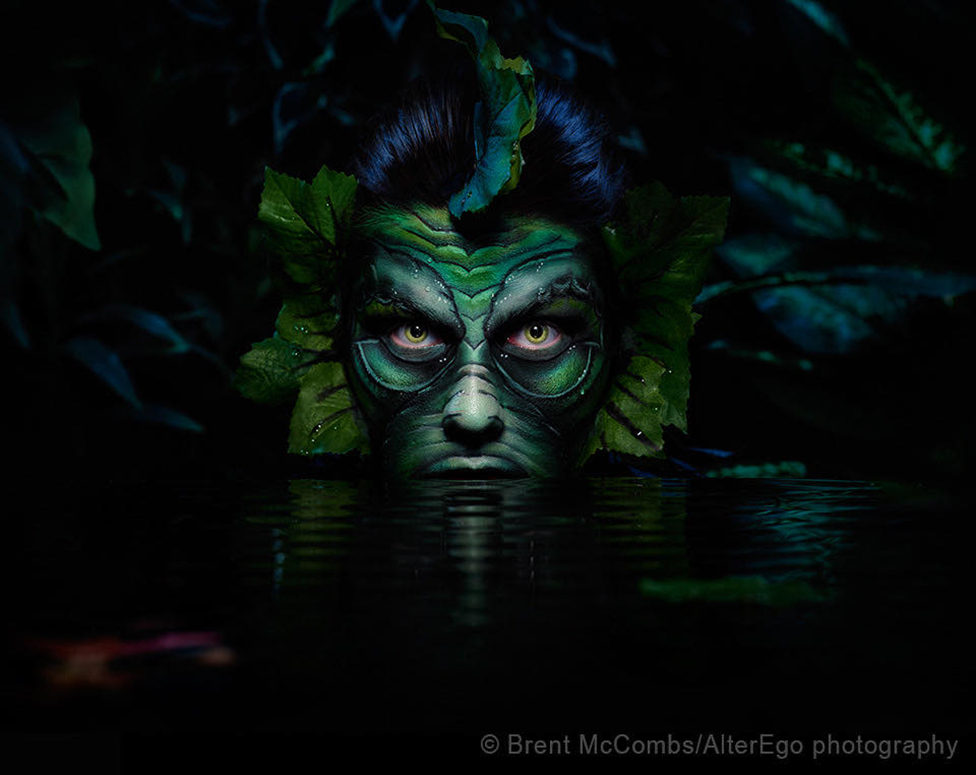
With these four images done, and time remaining, we moved on to the Creature from the Black Lagoon. I was really getting into shooting what was turning into a pretty nice series, and with the pressure to get the four images Elle needed removed, I knew the next image or two would be on my time, and I wanted to go the extra mile to challenge myself. We took a few days off to go back to regular life and real paid work, but set Oct 28th as our shoot day for The Creature From The Black Lagoon. I had nearly a week to plan the shoot, but was getting anxious as the day approached. I knew the basics of how I wanted to frame the shot - creature emerging from water - and Elle said that would be great because doing the prosthetics around the creatures mouth might be beyond her ability at that point… so we were focusing on the eyes.

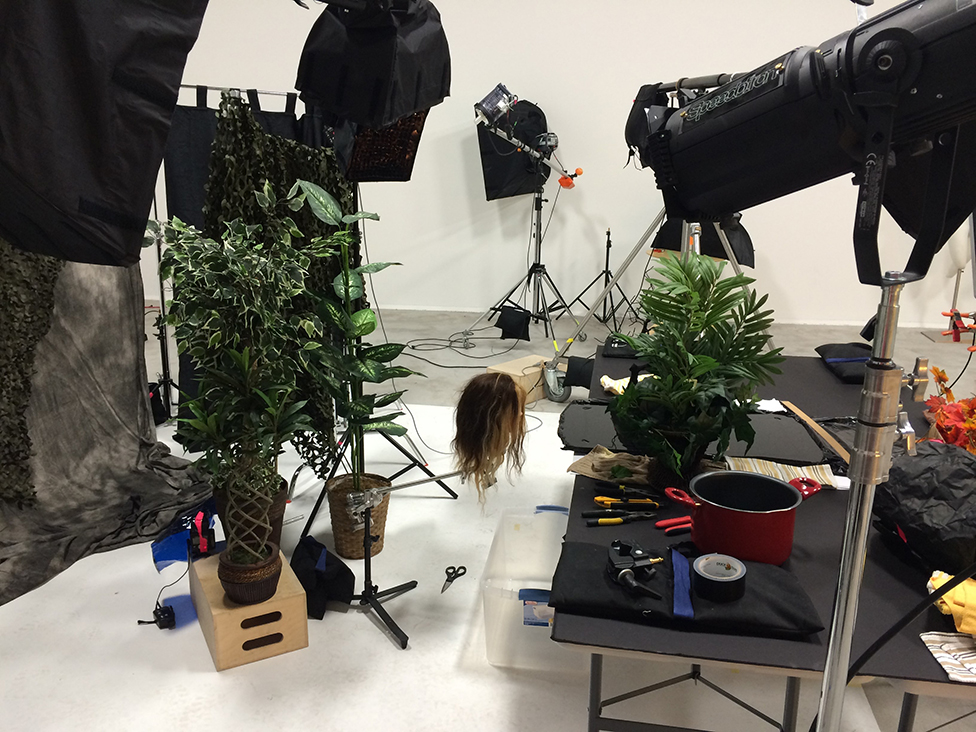
To make the effect of the creature emerging from water in studio, I initially thought of finding a huge blue-bin type thing and filling it with water. However with a studio on the 2nd floor and such a water-filled object possibly weighing too much for the structural integrity of my floor (according to my studio partner, the engineer), I revised my ideas. Instead of going big on the water, I thought maybe I could go small, using a sliver of water in a cookie-sheet type container. If I shot from far enough away, using a long lens for compression, and with correct positioning of the model, I hoped it would look right. I was less concerned with reproducing the "swamp environment", as my studio has a collection of plastic plants I use for set decoration frequently. I figured those with some blue gelled lighting would give me a reasonable night-in-the-swamp effect.
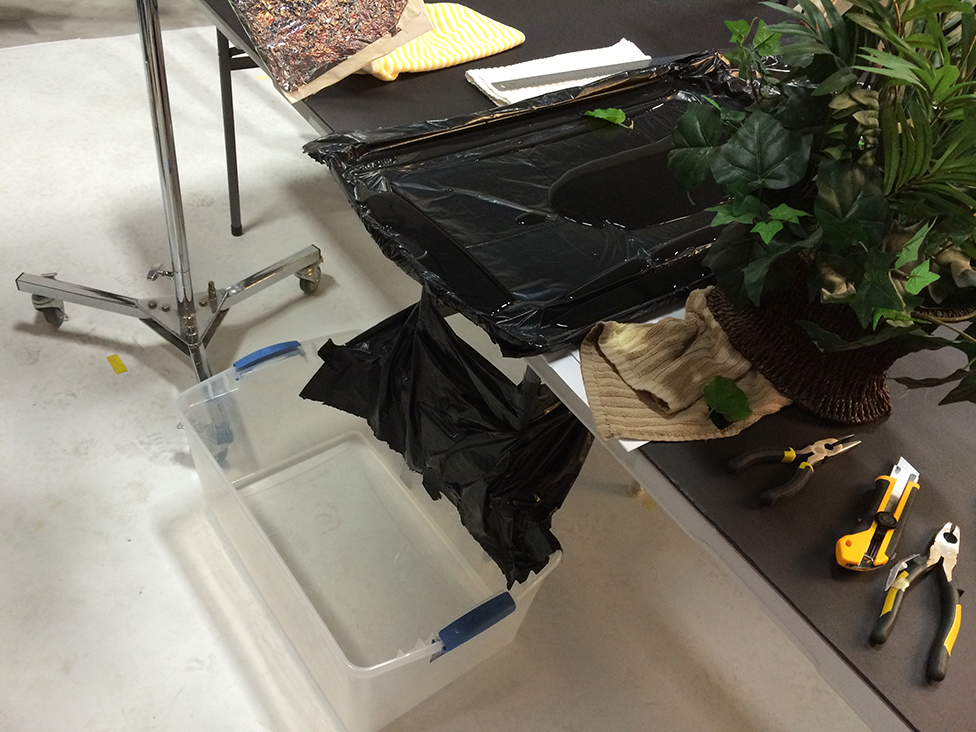
On the day of the shoot, I brought in my cookie sheet from home, but quickly discovered 2 problems. 1) the cookie sheet was too small, and 2) the rim showed up in the shots. To have a larger water surface, I switched to to a lid from the largest Tupperware storage box I have in the studio. This being clear plastic, it really caused the reflected light to have the rim stand out like a sore thumb. To tone that down, I lined the lid with a black-plastic garbage bag. This helped a bit, but the bag wasn’t perfectly smooth, and the crinkly plastic was shiny and gave me specular highlights right across the face of the model. This was proving to be a tough nut crack. I started tipping the lid more precariously toward the spilling point, trying to get the water right to the edge of the rim. I then realized if I just let the water spill, it would cover the entire edge. I grabbed the Tupperware container itself, stuck it under the table, and had my wife (who was on set helping) and Elle, come over for a test. They lifted the water-filled lid just a bit on the side closest to camera, so the water spilled over the edge, into the Tupperware… and it looked perfect. Yay! Problem solved.
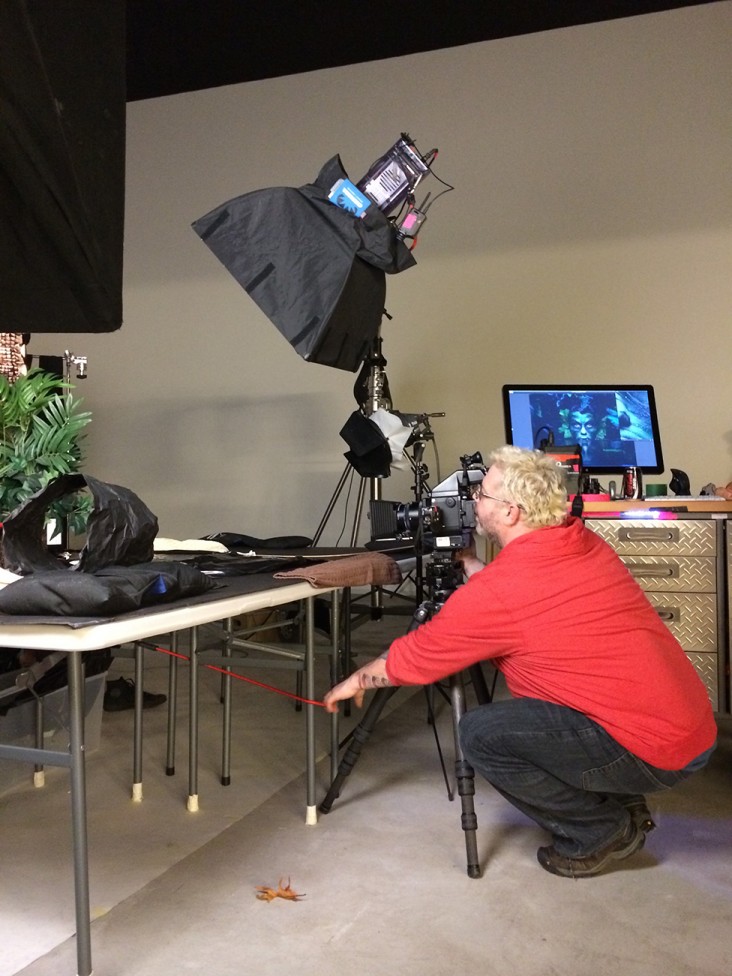
Only, it wasn’t. Something didn’t look quite right above the test shot. I realized that if a creature was emerging from the water, there would be ripples radiating out from it’s head. I set about trying to recreate the ripples over the next couple hours, but failed badly. Dropping a penny into the water didn’t work. A tiny pebble failed too. I was stumped. I had a pop, sat on the couch, frustrated and pretty much resigned to just shooting static water when a distant memory came into my mind from watching a documentary on the making of the original Jurassic Park movie. During the scene when the T-Rex first appears, the cast is in an SUV, and our first hint something is coming is that the coffee on the dash board shows ripples - presumably of the giant lizard’s big stomp feet. According to the documentary, making those ripples had been as big a challenge for the film makers as was proving for me. They tried mini explosives and dropping things in the cup to no effect. Eventually they solved the issue by running E-String piano wire between the two sides of the vehicle frame, and having a crew member pluck the string each time they need ripples.
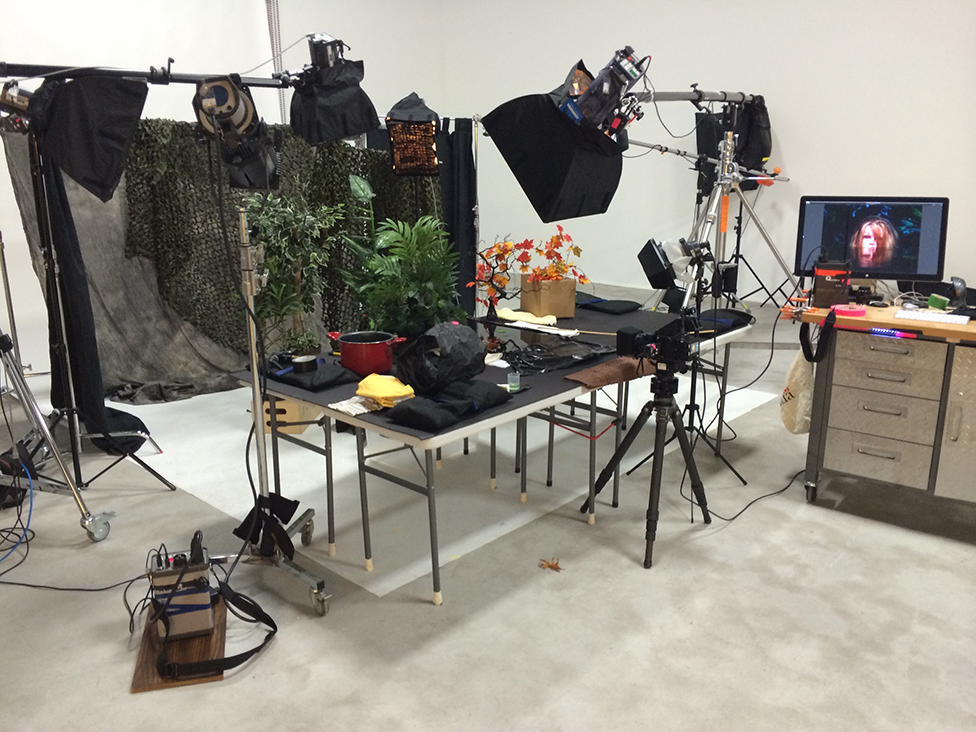
Main light was a small gridded soft box, with two other small gridded boxes as hair lights, and then three more lights on the background plants.
I wondered if the "piano wire solution" would work for me. I took some bungee cord and ran it between two legs of the table. I had the water filled tupperware lid on, and began plucking… and astoundingly, it worked! My set was complete.
Article submitted by Brent McCombs. Brent trained in Los Angeles and worked as a fashion photographer for nearly a decade, In 2015 he moved to Atlantic Canada and began shooting weddings and portraits. Brent is the owner/photographer of AlterEgo Photography. He currently resides in Halifax with his wife Sarah, their 4 birds, a cat, and a horse. Brent joined the PPOC in 2016, and has two Accreditations: Fashion photography and Portrait photography. Brent was the PPOC-A Portrait Photographer of the Year in 2017.