Thursday, October 31, 2019
FOR THE LOVE OF MONSTERS
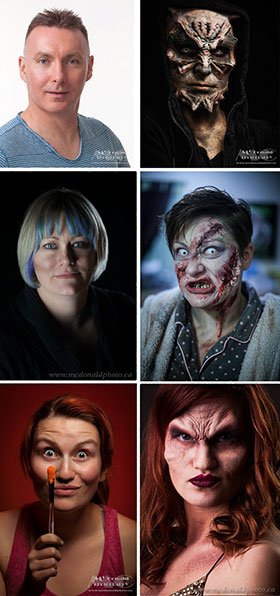
"Images and Story by Jeff McDonald". Halloween has always been a favourite time of year for me. I get it honestly though…my mom always went above and beyond when decorating for Halloween and our house was usually the spookiest on the block. Fast forward 30'ish years and my wife, daughter and I are carrying on the tradition, but via special effects makeup, body painting and photography.
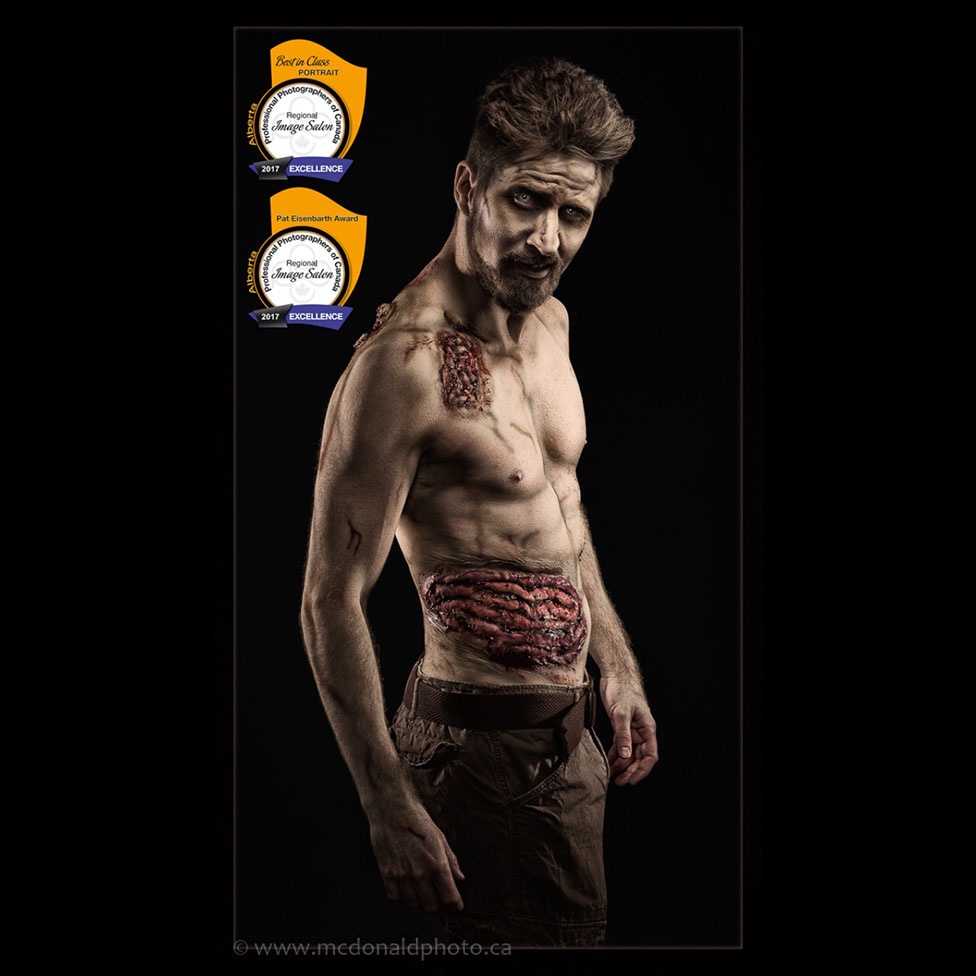
We started doing Will’s (above) makeup a few years ago, for his yearly Halloween party. We "knocked his idea out of the park", with a multi-prosthetic and upper body Zombie themed body paint that we titled “What’s For Dinner?”. The final image of this piece earned us a score of Excellence at the Alberta Image Salon and a Merit at the National Image Salon. The image also won Best in Class Portrait and Best in Show at the Alberta Image Salon.
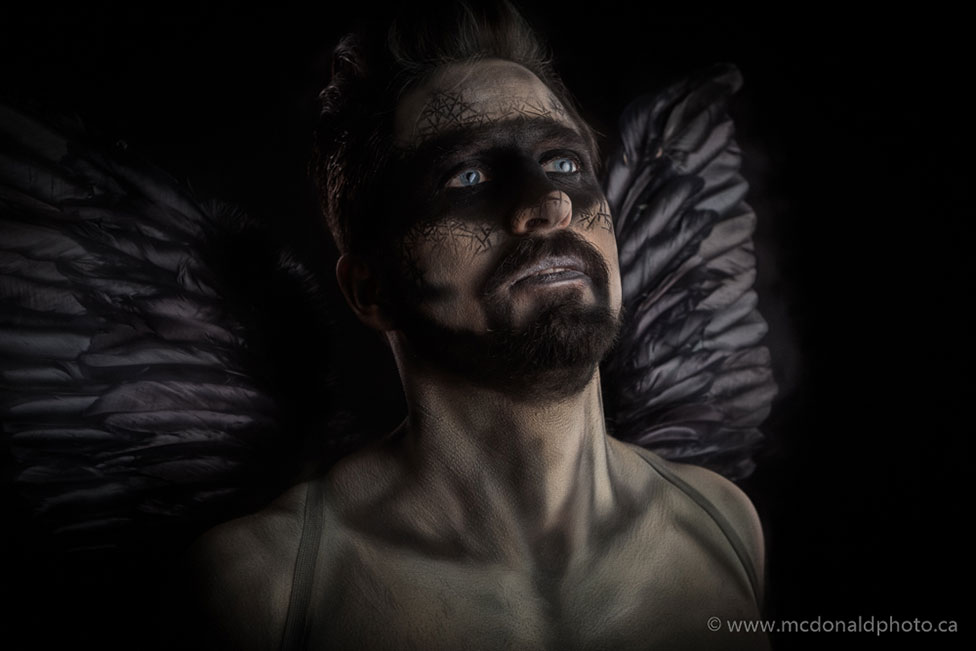
Last year Will stopped by again and we went with a dark theme that we called “Fallen Angel”. No prosthetics this time, but a great result nonetheless and an amazing performance by Will during the shoot that scored a Merit at both the provincial and national salons.
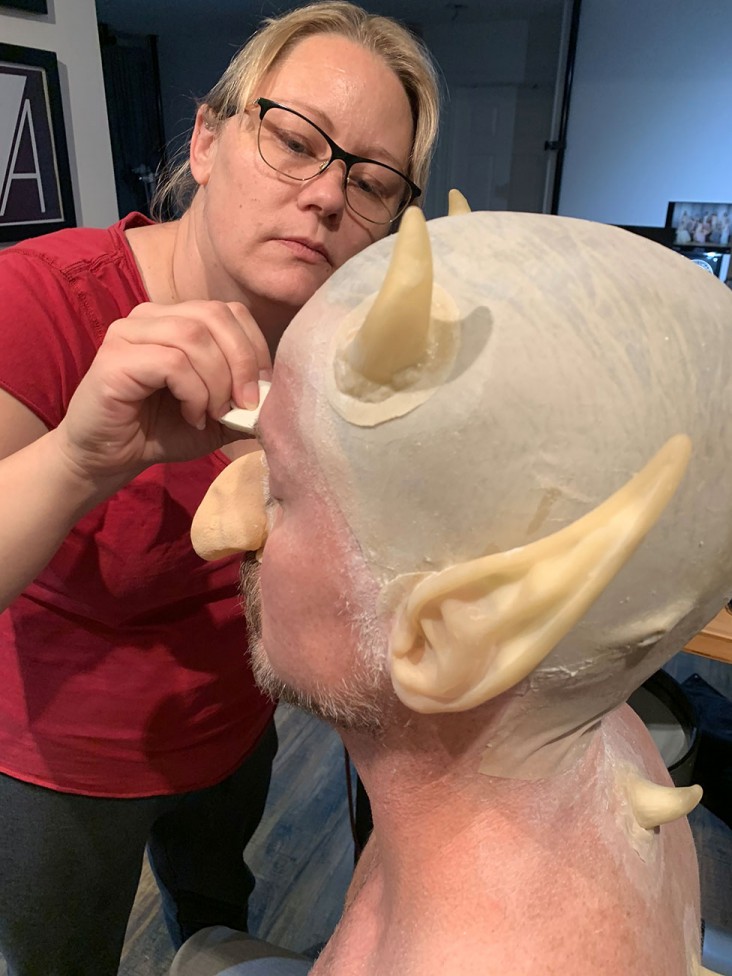
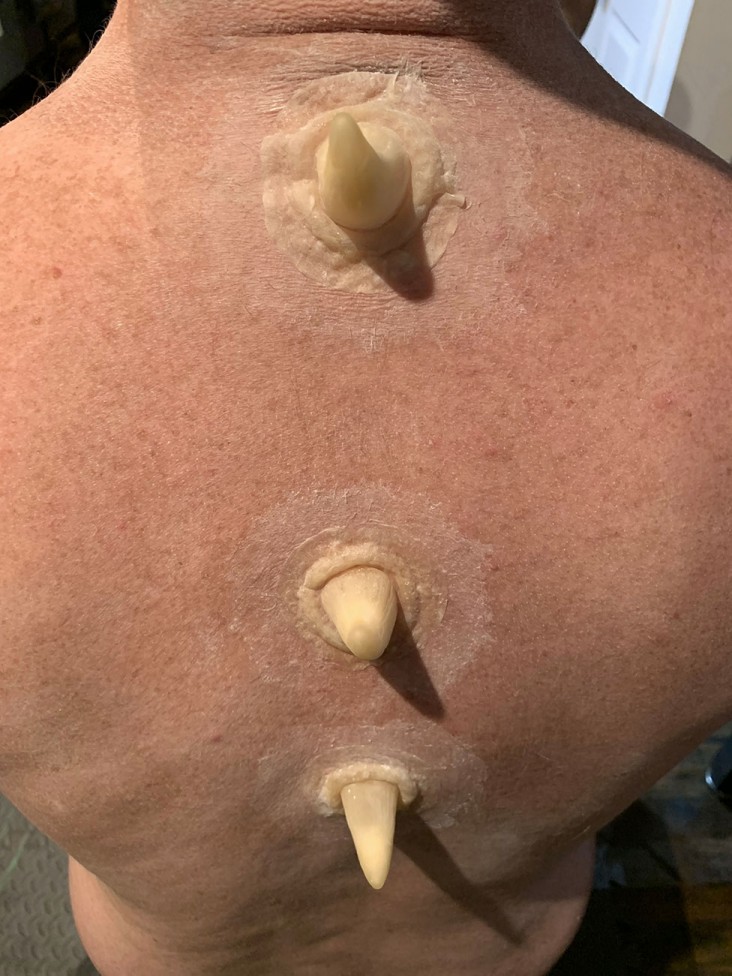
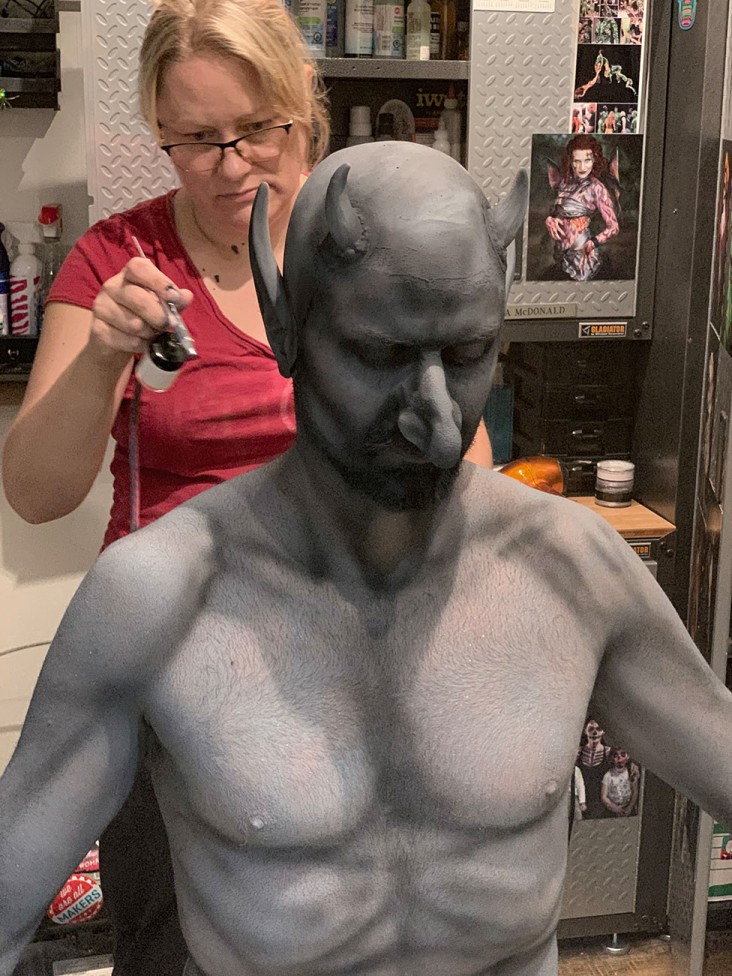
This year Will contacted us and wanted to be turned into a Gargoyle including a bald cap, prosthetic ears, nose and spines. Of course, we were on board with the theme. He came to the studio this past weekend, and we began creating his transformation. Themed images can be somewhat time consuming when prosthetics and bald caps are involved, as we must start with these appliances and ensure they are secure before adding any makeup. This process can take at least an hour and at times can be several hours, depending on the complexity. This is not the most exciting part of the session.
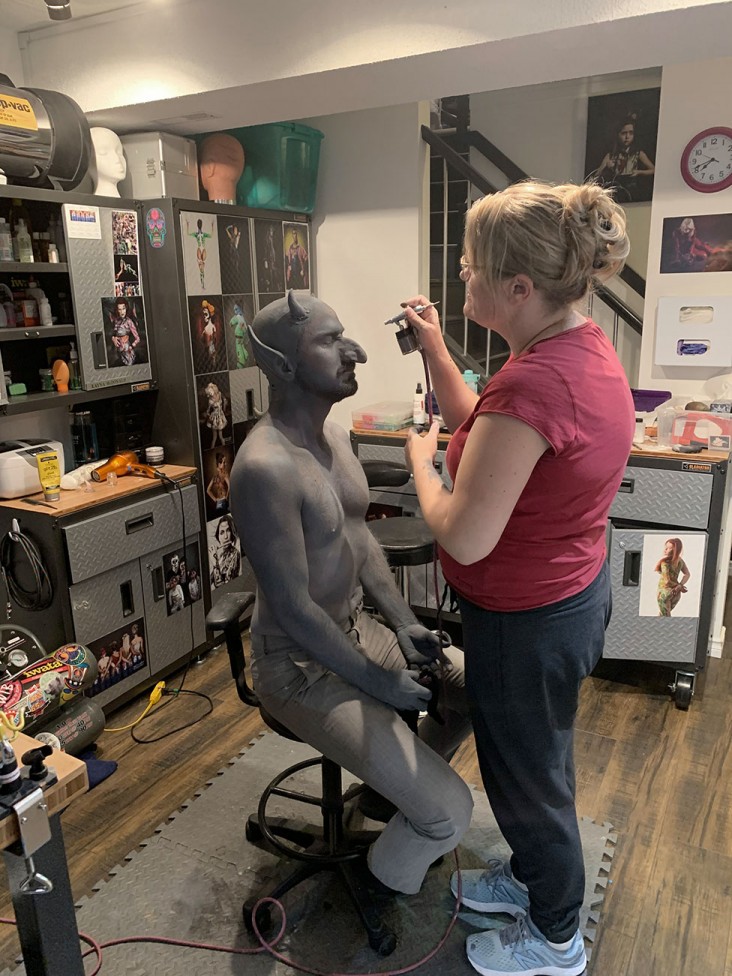
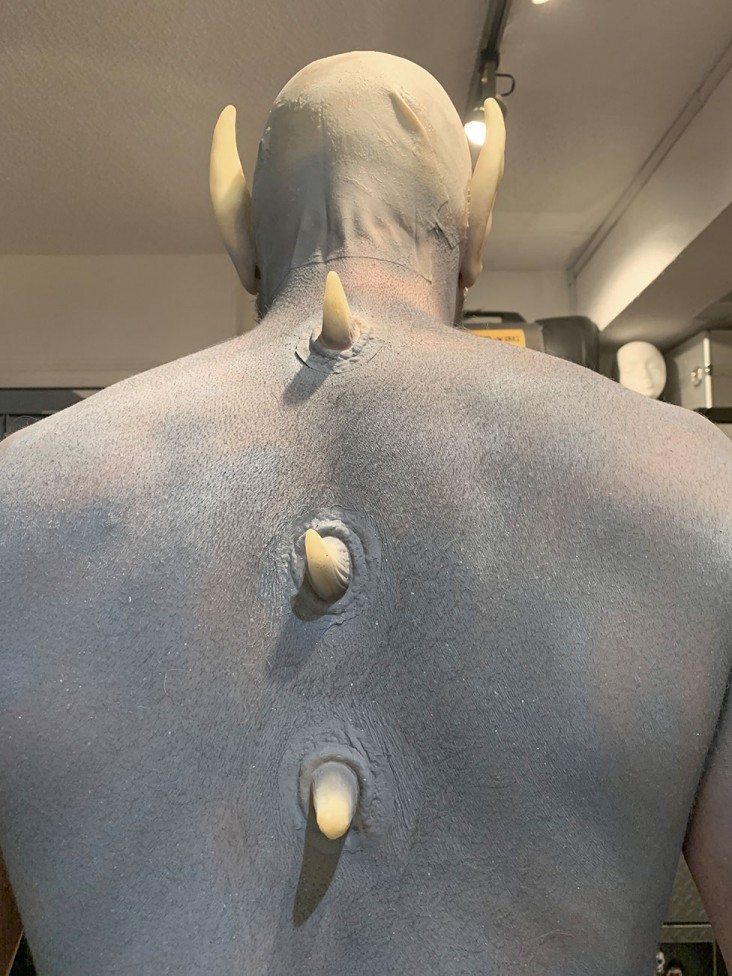
Once the appliances are applied, we then move on to applying a base coat of makeup. We usually use an airbrush and our primary choice is Pro Aire body paint. Appliances behave differently depending on their base composition (silicone, latex, etc.) and some take more work to blend in. When we’re happy with the base layer, we move on to applying the contouring & details. This is when the concept really comes to life and the piece starts to take on a life of its own.
The final makeup step is to apply the “finishing touches”, aka small extras that tie the design together and really sell it—think of these like filters and other finishing layers we apply to images as photographers.
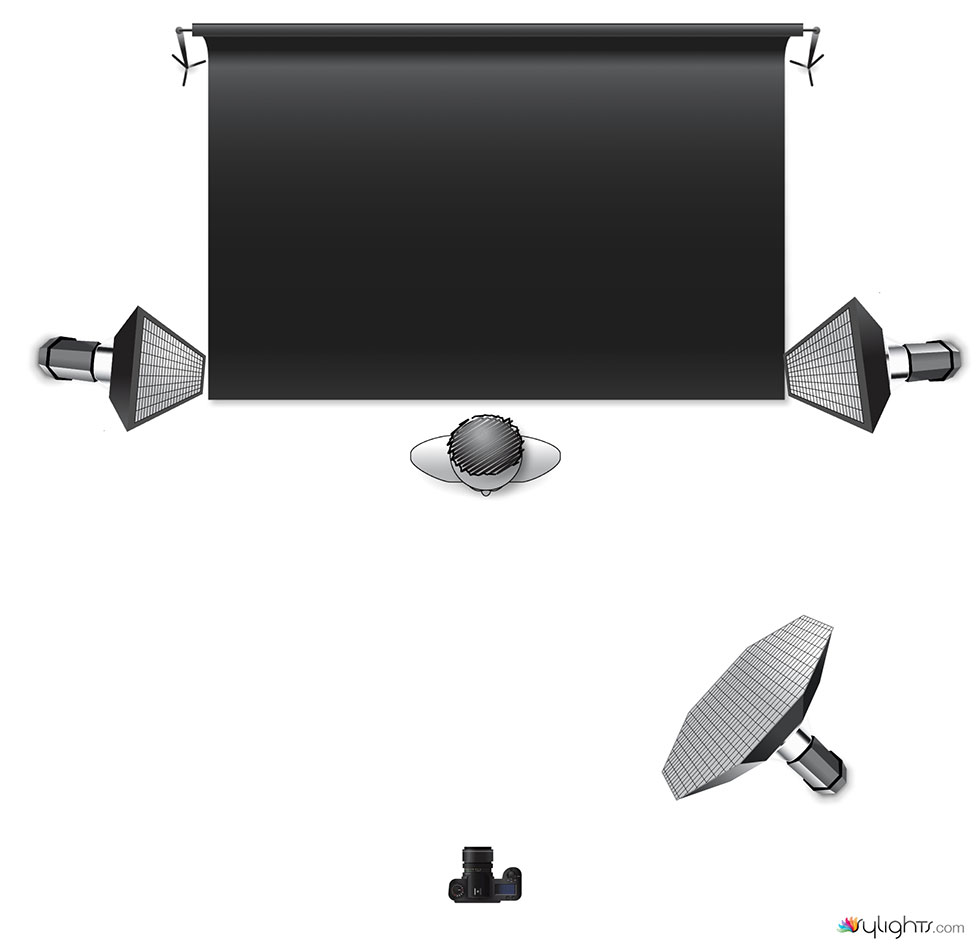
This lighting setup I used for the final image (below), is very similar to the other setups I used with this model. I like using grids on my softboxes to really focus in the lighting. My main light is usually a 48" Octabox or a 24" Beauty Dish depending on the result I'm after. I alternate between a single hair light and side lighting with One or Two 12"x48" Strip Lights. The lighting setup for the Zombie image was almost identical to the Gargoyle. The Fallen Angel lighting image was similar, but with the beauty dish in front and above the subject.
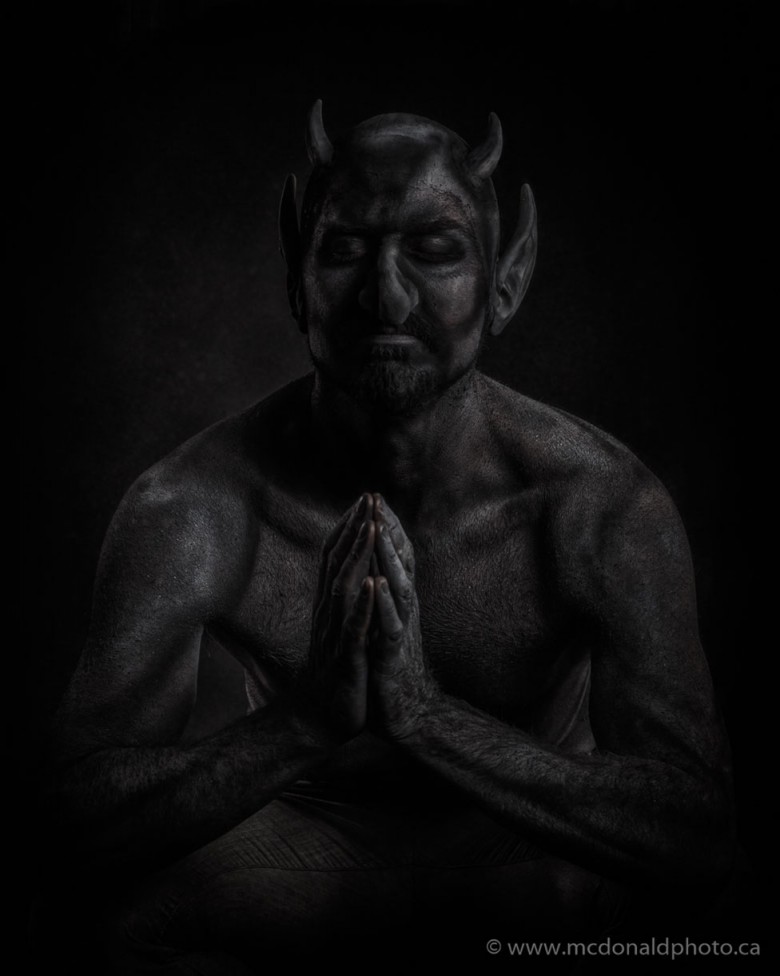
The last step in the whole process is taking a few minutes in the studio to photograph some images. For a client like Will, his goal is to get to his event, so photo time is limited. For the Zombie image, we shot 9 frames and the Fallen Angel a few more. For the Gargoyle, we did 12 images and this was the final result.
Article submitted by Jeff McDonald CPA.
Jeff holds his Craftsman of Photographic Arts designation with the PPOC. He has accreditations in Animals, Commercial, Performing Artists & Studio photography. His studio specializes in conceptual portraiture and thrives on images where he brings his client’s vision to life. He is assisted in the studio by his wife Rayna (@bodyartbyrayna on IG) and his daughter Kyra (@makeupartistrybykyra on IG) who work together as the primary makeup artists and body painters at McDonald Photography. You can also follow him on social media: @mcdonaldphotography on IG; @mcdonaldphoto.ca on FB. His website is: www.mcdonaldphoto.ca.