Thursday, October 15, 2020
Featured Photographer: Brent McCombs
Leading up to Halloween, who better to feature than the creepy Brent McCombs of AlterEgo Photography, Halifax? (Just kidding, Brent is not a creepy guy, but he does create some fantastically creepy imagery). Brent is a commercial, wedding, and portrait photographer, but his monster photography is a passion project. Pull up a chair and dim the lights, Brent spins quite a tale!
“Pushing the boundaries of what is possible (for me) to do with light is not something I usually get to do in the commercial work I am normally hired for. In that work, It’s often either basic portable lighting kit shooting fashion in outdoor locations or relatively conventional lighting setups for catalogue work in the studio.
So when friend and local makeup artist Elle Munster approached me to ask if I’d like to work on a series of images of B-Movie Monsters to show off her theatrical/fantasy makeup, I jumped at the chance – on one condition: 1) Since we were showing off makeup skills, we would do no photoshop on the images. Elle agreed, and we were off to the races. If races take three years to complete.
We started with some basic, well-known monsters, and truthfully, the images weren’t that special. We did Wolfman and Dracula on the same day. I had just wrapped a commercial shoot the day before and had less than 2hrs to light the sets.
Disappointed, I talked to Elle afterward. I told her I loved the concept, but that if we weren’t using Photoshop, then I really needed time to do the lighting setups. She asked how much time I needed, and I replied honestly that I wasn’t sure, but that it would be at least a full day before the shoot.
She agreed and we went forward with planning our next shoot – The Mummy.
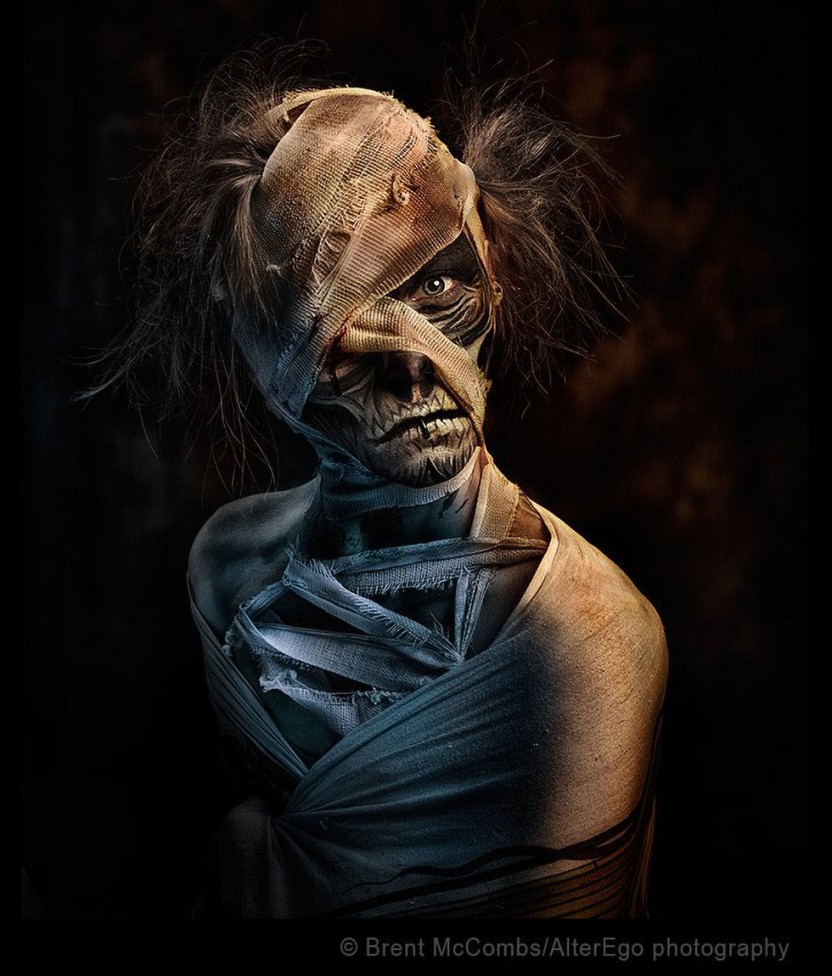
THE MUMMY
Using a mannequin stand-in, I spent the day before the shoot building and adjusting the lighting. It was a LOT of trial and error. After about 4 hours, I felt I was reasonably locked in. Shooting tethered and being able to see my results in near real-time was very helpful.
I wanted to replicate the idea that the Mummy had recently come alive inside a dark tomb, and was being lit by torchlight from within the pyramid, but was about to go outside into the night. Not feeling comfortable with an actual torch flame in my studio, I chose to do all of this implied, with no practical lights in the frame. Warm and cool gels helped me achieve this.
The following day the makeup took nearly 3hrs to apply, but shooting was relatively quick, in about 15 minutes. The result was the first image in the series I was truly happy with. The look of anger and hate in the model’s eyes was the hardest part to achieve (she was giggling for a lot of the shoot), but once she nailed that, everything was perfect.
CREATURE FROM THE BLACK LAGOON
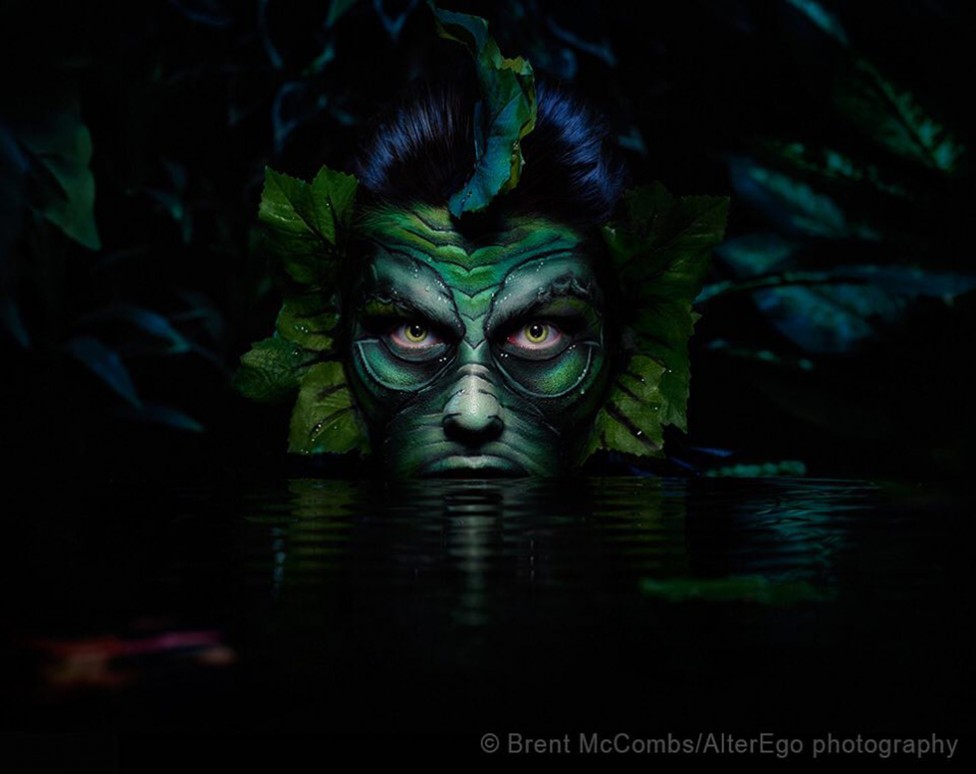
Several months passed, before Elle and I got together to plan the next shoot. As soon as Elle told me she wanted to do the Creature From The Black Lagoon, I know our next project would be one of the most challenging.
Elle was struggling with how to do the makeup on the creature’s mouth. Eventually, we came up with the idea of the creature emerging from the water so that the mouth was still submerged – thereby cheating and allowing Elle to skip that part.
But that meant I’d have to somehow fake a model in water. It was February so outside pool shooting was not an option, and my 2nd-floor studio didn’t have a pool, nor would the floor be sturdy enough to hold that kind of weight (little did I know if I waited a year, there’d be a large pool downstairs – but that’s another story)…
We had a few weeks between our first conversation and the shoot, and in that time I first practiced lighting some dense foliage to simulate a swampy, moon-lit background, and try out ideas for water. Eventually, I hit on the notion of using the lid of a very large Tupperware storage container, turned upside down, and sat on a table and filled with water. On the first attempt, it looked okay, but the clear plastic lip stood out like a sore thumb. So I next tried lining it with a black garbage bag – which was better, but you could still just make out the edge of the bag across the middle of the frame. Finally, I hit on the idea of pouring the water slowly over the edge, into the container itself, with the model placed just behind it. Using a 200mm lens and taking advantage of compression, our model should seem like she’s in water.
But the final challenge was to get the ripples in the water that would ‘sell’ the fact that the creature had just emerged. This was harder than I thought. Initially, I was going to try and drop a pebble into the water, but that gave a weird bloop look, more than rings. I didn’t solve this until the night before the shoot when I literally dreamt up the answer. Years before, I had seen the making of Jurassic Park, and in that documentary, they talk about the FX guys trying to get ripples in the coffee cup on the dash of the SUV in the moments before the T-Rex reveal – simulating the heavy steps of the approaching giant lizard. In my dream, I remembered this whole scene perfectly. They had tried mini explosives and other things with the coffee, but eventually, the only thing that worked was stringing piano wire to the frame of the SUV and having someone pluck the string each time a step thudded down.
So when I got to the studio armed with a bungee cord from home. I ran it tight between the table’s legs where I had the water set up on, plucked it, and low and behold… round ripples! Huzzah!
Elle did an outstanding job on makeup and the only hiccup came when the model just could not get the yellow contacts in her eyes without extreme discomfort. We tried for over 20 minutes, and she was a trooper, but she’d never worn contacts before and it was just too painful. Elle was super disappointed, but we went ahead without. And the shoot was otherwise as smooth as you’d want. When I was rendering the image, I could tell how much better the yellow contacts would have been, so … I made the tough decision to break my no-photoshop rule, and ONLY adjust the eye-colour. We’d had the contacts on set, and I figured Elle would be happier. I was right, she was thrilled with the image.
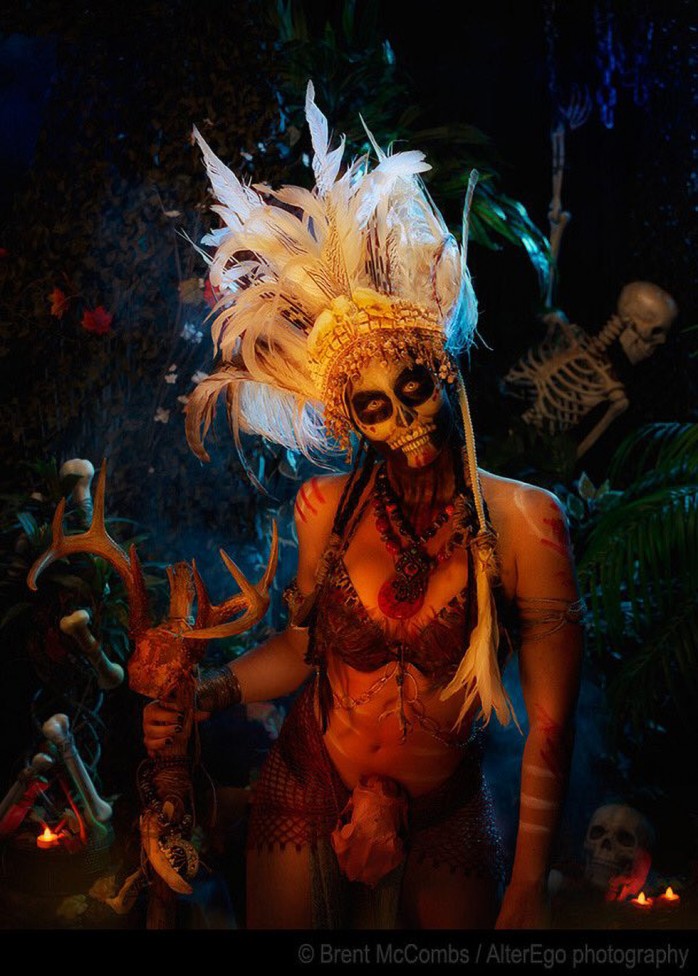
VOODOO SKULL PRIESTESS
That spring, Elle and I ran into each other at a pub one night, and a half-hour or so later, a local model and friend stopped by. We were already talking about our series and Jordyn said she’d love to be in one of our shoots. When she left, Elle and I decided to shoot soon -and it ended up being the next week.
The shoot fell in between gigs for me, and as a result, I had only one day for set and lighting design. But with Elle having pitched “Voodoo Skull Priestess” as the subject, I figured a jungle scene would be easy enough for set deck, and then I wanted her dancing around a fire pit. In the end, I built a fake fire pit, but it looked pretty lame, so we ended up pushing in and cropping out the fire from the final takes. We got the warm glow from three gelled lights – two red and a yellow from the fire, and a red on Jordyn. Once again, cool blues were used on the foliage. The headpiece was a bespoke item from a Los Angeles based designer friend who runs Bubbles and Frown Haberdashery.
The most challenging part of this shoot was making the staff – Jordyn just looked a bit lost once we cut the dancing out, and giving her the crystal skull felt too repetitive – so Elle and I hurriedly cobbled some antlers and a stick from the bush outside, and odds-and-sods into the Priestess’s staff. Getting the antlers to not flop around required drilling a hole in them and fixing them to the stick with a screw.
Of all our shoots, this is the one I’d most want to do again, as I think if we could shoot outside with a real fire pit, the overall effect would be better.
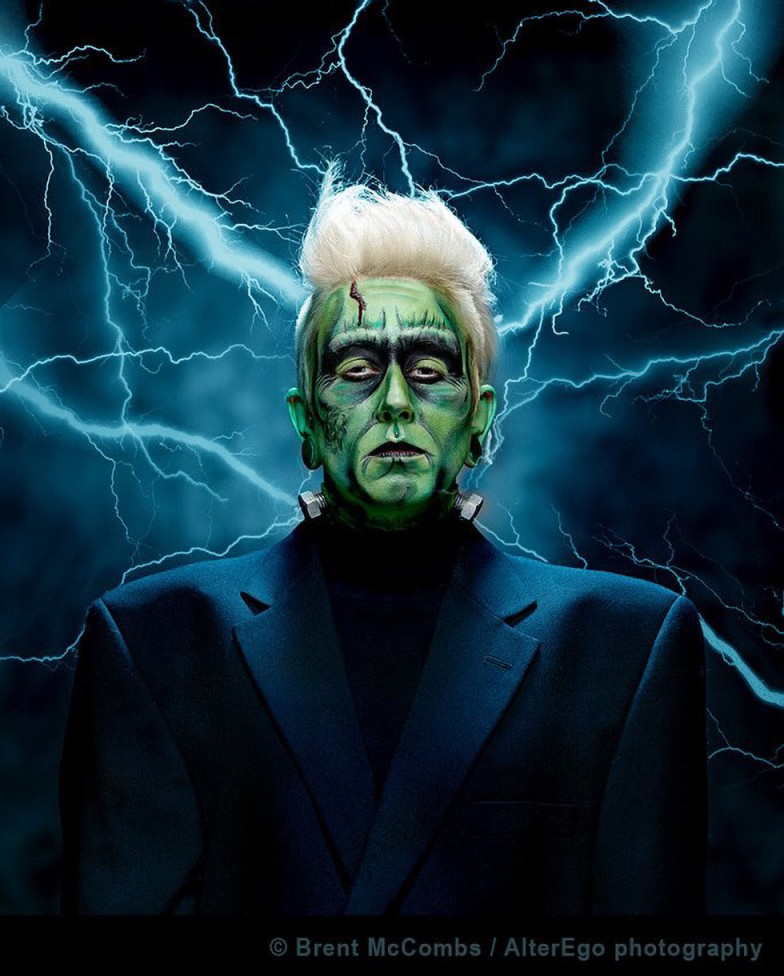
FRANKENSTEIN’S MONSTER
October was quickly approaching and we hadn’t done a monster shoot for many months when Elle and I were working on a commercial set together. We lamented the time off but were both very busy with other work. Still, I said, ‘let’s do one – we can make it a one-day quickie’. Elle agreed and said ‘how about Frankenstein? I was excited but we didn’t know if we’d get it done. I said, let me know when you have time, and we will try and find a spot.
It turned out, this one was done fast and dirty. Elle messaged me on a Wednesday evening and said “I had a cancellation tomorrow, are you free?” I was supposed to be editing wedding photos, but I said, ‘Sure’! So into the studio we went at noon the next day, and in 4 hrs, we had the shot.
But as we were shooting, I kept thinking (and saying) “This needs something else”… and just before we finished the shoot, Elle asked, ‘What about lightning’? Damn… she was right, but I couldn’t think of any way to fake lightning realistically in the studio in 20 minutes. So I said, ‘I can do that, but we have to break the no-photoshop rule again’. We thought about it and decided since it wouldn’t at all affect the makeup look, it was fine. So the lightning in the image is just added after the fact.
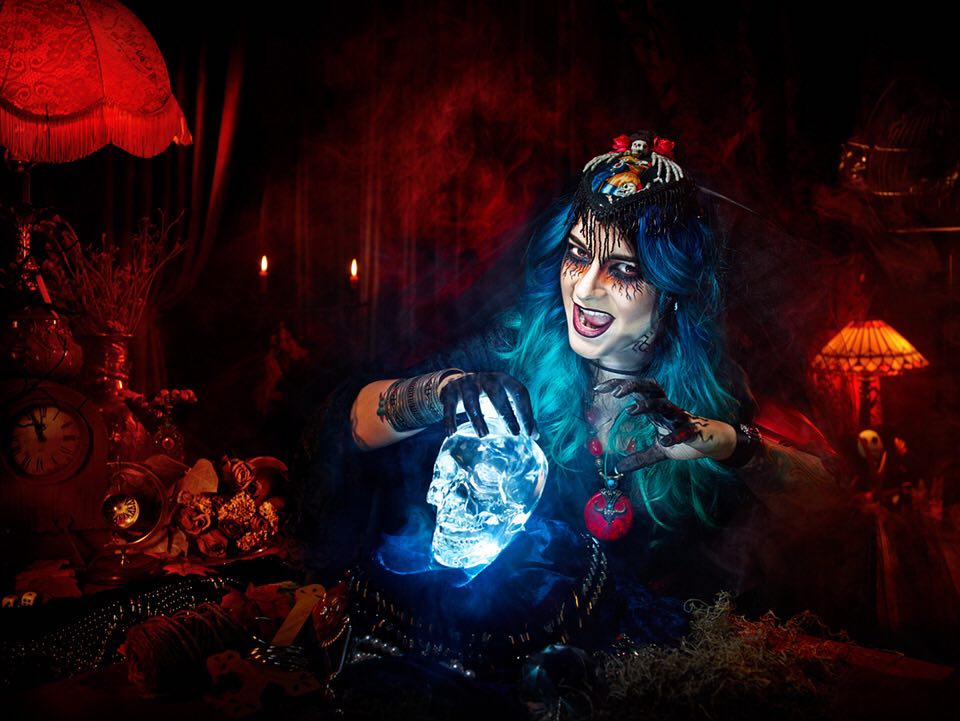
THE FORTUNE TELLER
With about a week to go before Halloween and the Frankenstein shot just posted, I’d really gotten the bug again… and I messaged Elle saying “We should try and do another”… She replied that she had a free day that Saturday. In the event, we decided to not try to book a model on short notice, and Elle would step in.
We went into the studio and I didn’t know the monster. She told me she wanted to do an old-school style Fortune Teller/witch. I loved the concept. We had planned the day around the shoot and we were going to build the set together, and then I’d light it while she did the makeup.
LOONG story short (it could be an article on its own), this build turned into the most complex set and lighting design I’ve ever done – then and since.
We started to build the set but I knew I wanted it to look like a small confined area, but since I light with zones, we’d need to use compression and the old ‘Lord of the Rings’ trick to make things seem near when they weren’t.
We set up the spot where Elle would sit, then I locked the camera in place. From there we built out the set. This started to take on a life of its own and the original ‘hour or two’ to build the set turned into 4 and then 6 hours. At some point, I said to Elle – this is going to look great if we do it right, but there’s no way we can shoot today – are you cool shooting next week sometime and leaving this with me to light? She agreed. She had to work on Sunday, but had Monday and Tuesday off.
I continued on the set design on Sunday myself and started the lighting design. In the end, I used every single light I had in the studio – 12 strobes, 4 speedlights, three hotlights, and two candles. Everything was snooted or flagged to make this giant amount of lighting to look like a very darkly lit fortune teller’s tent.
The biggest challenge for me was lighting the skull. I’d had the idea to use a crystal skull in place of the traditional crystal ball (I had a skull, but not the ball)… and my initial idea was that I’d sit a speedlight in a shoebox, cut a hole in the shoebox to fire the speedlight into the bottom of the skull. That would light the skull, making it glow, and also light Elle’s face. Perfect.
Except it didn’t work. Any light powerful enough to light Elle’s face through the skull blew out the details of the skull. If I retained the detail in the skull, Elle’s face was in the dark.
I had to borrow a strobe and snoot from my studio partner and attach it like a fixed bayonet under my lens, aimed right at Elle’s face, to both light her face enough AND making it look like it might be emanating from the skull.
All told it took two of us 2 full days to design the set, and me two and a bit days to light it. It’s one of those things I’m not sure I could do again very easily. We released the image on October 30th – just in time for Halloween that year.
We worked together on several more monster shoots, but our last was perhaps the most personal. A couple of years had passed since we had more or less put the series to bed when Elle messaged me in early December and said “Hey, want to do another”?
Of course, I did.
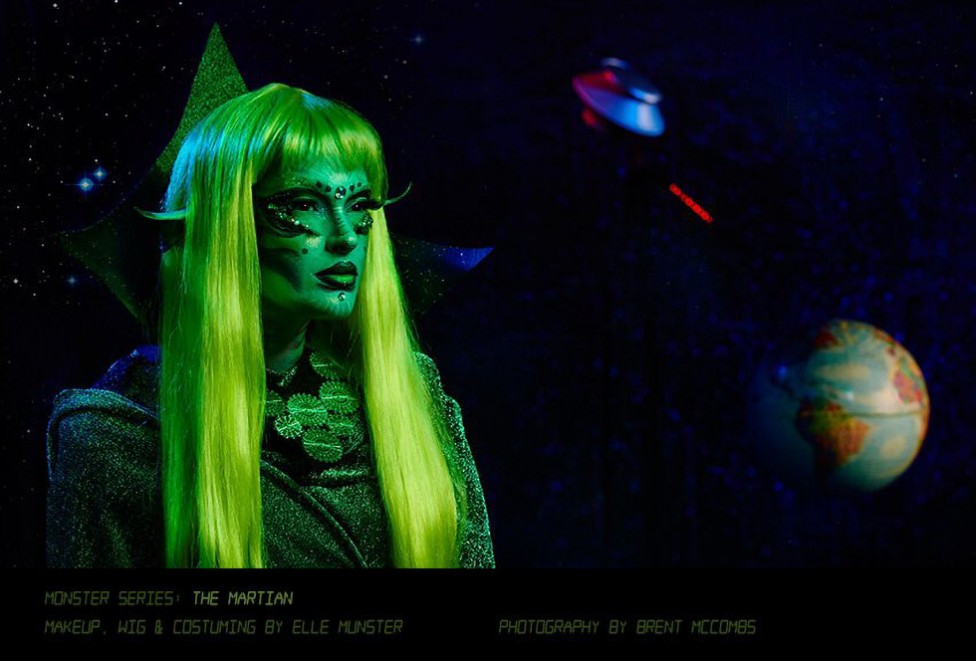
THE ALIEN
Turns out Elle comes by her love of 1950s Monster B-Movies from her father. And he’s a fan of the alien monsters the most. So Elle wanted to do a shoot, and make a print, to give him for Christmas.
We planned the shoot for the following week and I got to work trying to come up with a set design. I watched a lot of YouTube clips from old alien monster movies and saw a LOT of really basic FX. I wanted to replicate that.
My first step was to go to Value Village – I was looking for any prop that might sell ‘alien’ – I was thinking toy Ray Gun or something similar. I had no luck finding that, but I did find an old globe for $2.I thought, okay, Aliens like to destroy earth… so we can work with that.
Hanging the globe from fishing wire in the studio, I then had to make ‘space’ in the background. I had this glittery black tulle fabric that I used in my circus set background and thought it might look enough like stars. I hung meters and meters of it 10-15 feet behind the globe and added a couple of side-lights and WHOA – sparkle city. Too much, actually, so I cut down to 1 light and powered it way down. I wanted the hint of stars, not a Hubble shot of the milky-way.
Next, I needed a spaceship. That was a toughie. But watching the bad B-Movies paid off. I’d seen pie-lids slapped together to fake a flying saucer. I didn’t have pie-lids, but I looked around the studio and saw a couple of reflectors for my Elinchrom lights… They worked just spiffy. Saucer shaped, and cheesy. Exactly what I wanted.
Finally, I wanted to have the ship attacking earth… I needed to fake a death ray or laser beam…. Another challenge. I tried a lot of things that didn’t work, was thinking I might have to break our rule again, and then noticed the little USB light I had on my computer for seeing stuff on my desk when shooting with the overhead lights off… Hmm. I used a long, black USB cord, and some red gel wrapped around the light, and a couple more strands of fishing wire to get it in place… ready-made death-ray.
Elle came in and did her makeup in the usual amazing way. She was blue-skinned and looked amazing, but a lot of the Alien movies that weren’t in black and white had the aliens as green. So I had been prepared to shoot Elle in both normal light and in green-gelled light. We tried both, and since this was more a gift than to show off her makeup, she chose the green alien….
I’ve loved shooting Monsters and other creepy things with Elle and many other makeup artists over the years. Halloween is my favourite holiday and doing these creepy fantastic shoots is one of my main stress relievers and a great way to step out of the banality of catalogue and commercial shooting. I highly recommend everyone find something they love to do, separate from their paid work, and always make time for it. When Covid ends, I will be back at it for sure."