Thursday, February 20, 2020
BUILD YOUR OWN CREATIVE PHOTOGRAPHY PROPS
Images/Story by Mark Bilash. Looking to add more Creativity to your Photo Sessions? How about building your own Props, to create a special theme? That's exactly what I did for a unique Rosie The Riveter style Pinup theme. You can save money, as well as channel your creativity towards Prop Building.
THE IDEA:
I shoot a lot of Pinup Photography for clients at my studio (Vintage And Vogue Photography), and I am always looking for new themes to try out for this genre. I came upon a "Rosie The Riveter" Construction idea that was being done by a popular pinup photographer I follow on social media - Celeste Guiliano. She had a Steel Beam Prop, and then had her clients sit on it for various poses. I felt that I could IMPROVE upon the Steel Beam design, by adding more detail and thus more realism. I also wanted to use it for a Mom And Me type of session.
MATERIALS:
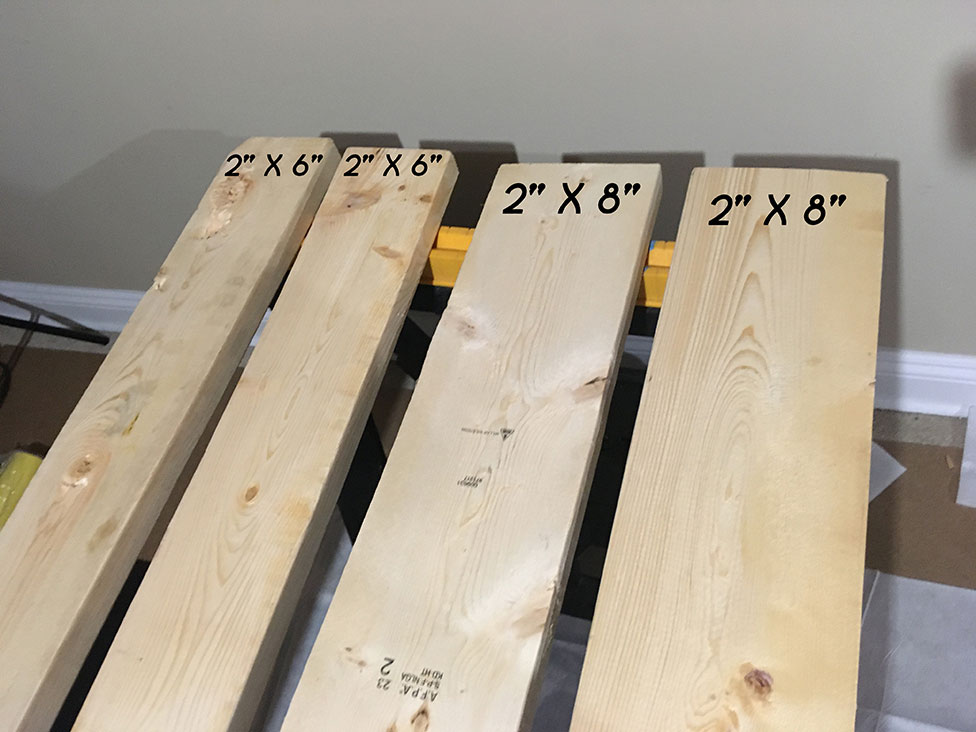
Four 10' long wood beams (Spruce, pine, etc). Two - 2" x 8" and Two - 2" x 6".
Paint Primer; Grey Metallic Paint.
Styrofoam balls; screws, metal brackets
THE BUILD:
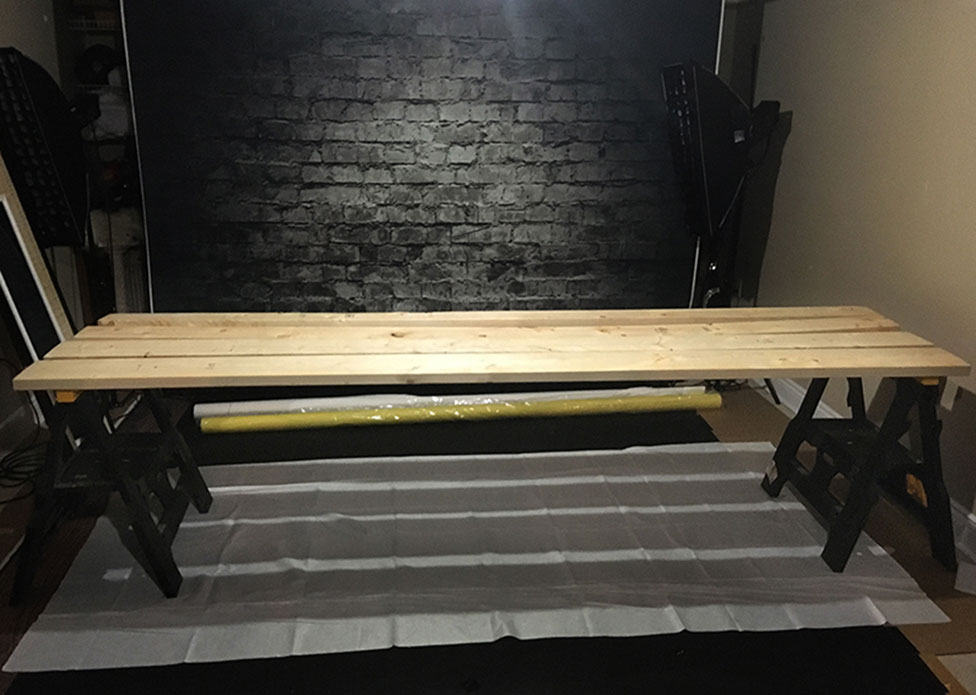
I knew what I wanted the final image to look like - basically one of those steel grey construction beams that you see in pictures that are part of a skelton of a skyscraper. I envisioned old photos of those daring construction workers from the 1930's that were sitting pricariously on those beams, many storeys up in the air. Two considerations had to be met in regards to the build. It had to be sturdy enough to SAFELY hold two people. It also had to look fairly authentic.
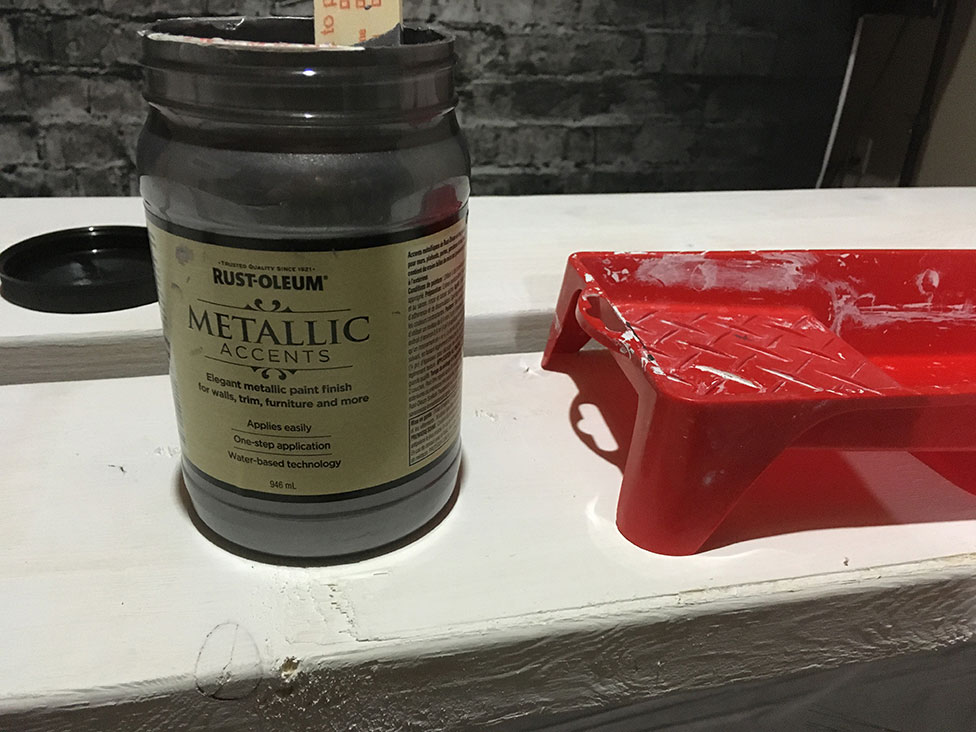
The first step was adding the Primer to each wooden beam. This was to cover up the wood, as well as adding a good base for the top coat of paint. I found a Metallic Paint at Home Depot that worked well. They had 2 different grey colours and I chose the dark one first.
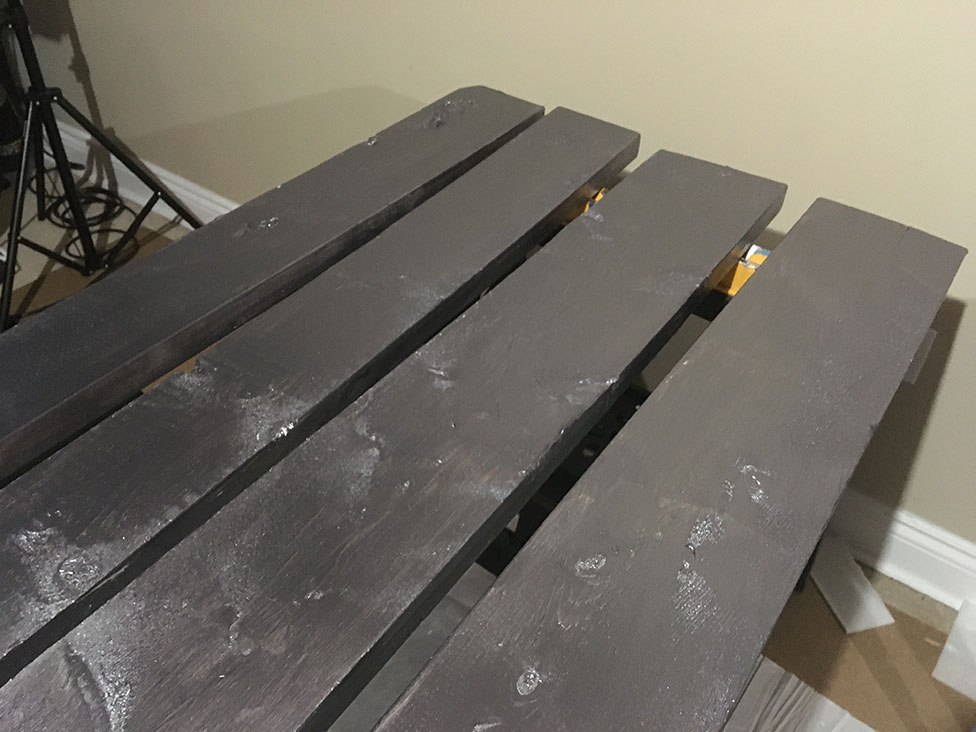
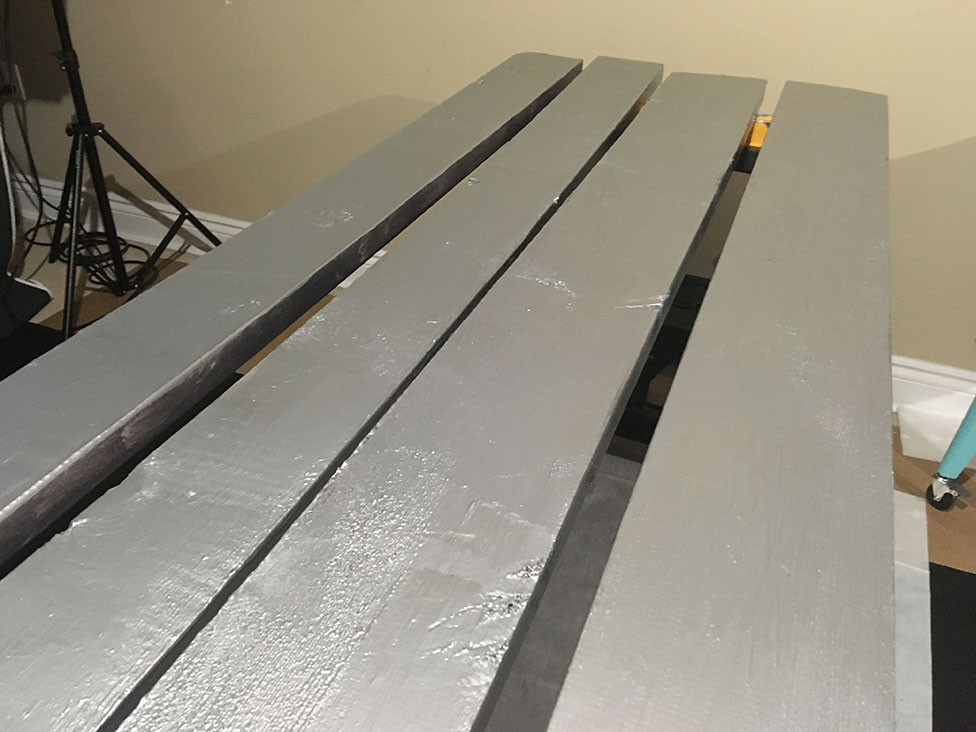
The dark tint didn't turn out to my liking, as it didn't look like a Steel Beam (see first photo above). I was concerned with "the details" of this prop, so I wanted to get the colour right. I purchased the lighter grey, and tried it out (2nd image above). It was exactly what I was looking for. It had that shiny bright metallic look, and I was starting to get excited about how this was going to turn out.
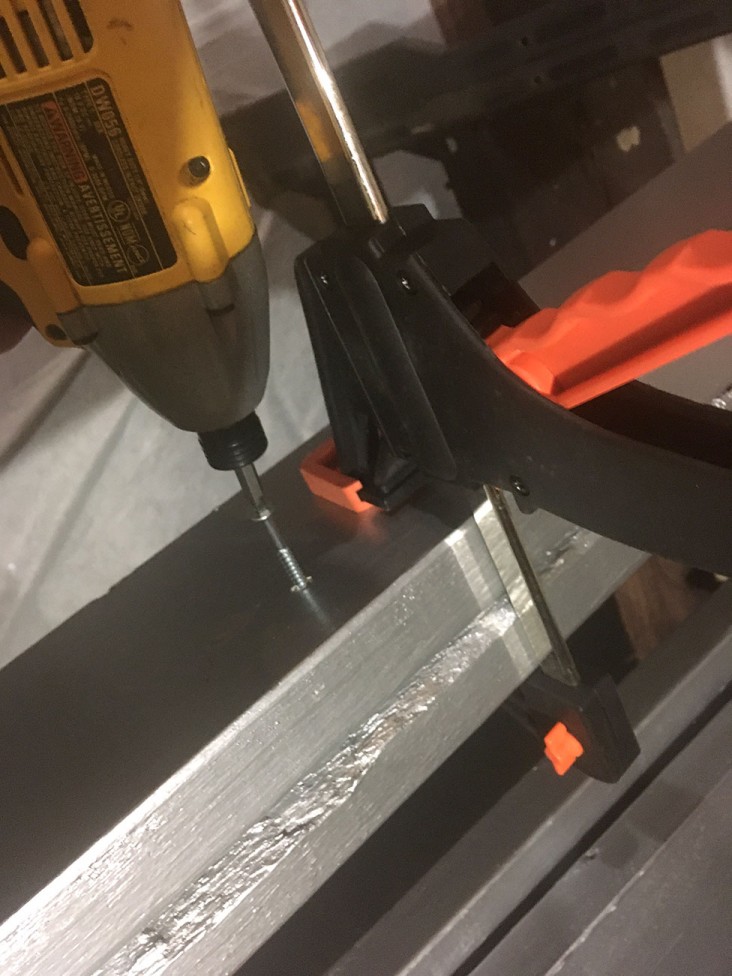
To solve the issue of the beam being STRONG ENOUGH for two people to sit on, while it was suspended in the air, I used some simple construction principles. I took the two - 2" x 6" beams and screwed then together. These two beams would form the inner part of the overall beam. They would be positioned upright so that the edge was facing up and down - thus giving the beam tremendous strength. The downward force of the people sitting on the beam, would be applied through the thick portion of the 2x6's. I then added a flat 2" x 8" board to each side of the sandwiched beams. This gave a wider space for someone to sit on thus providing more stability.
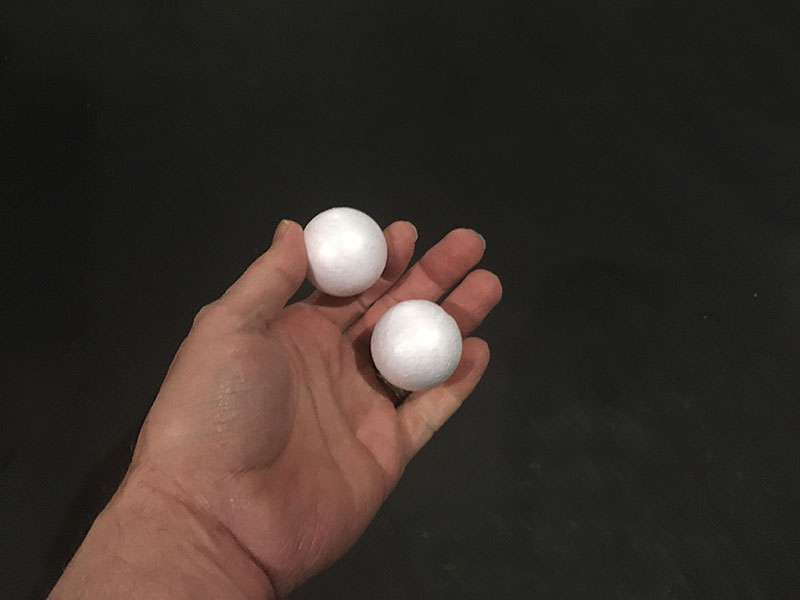
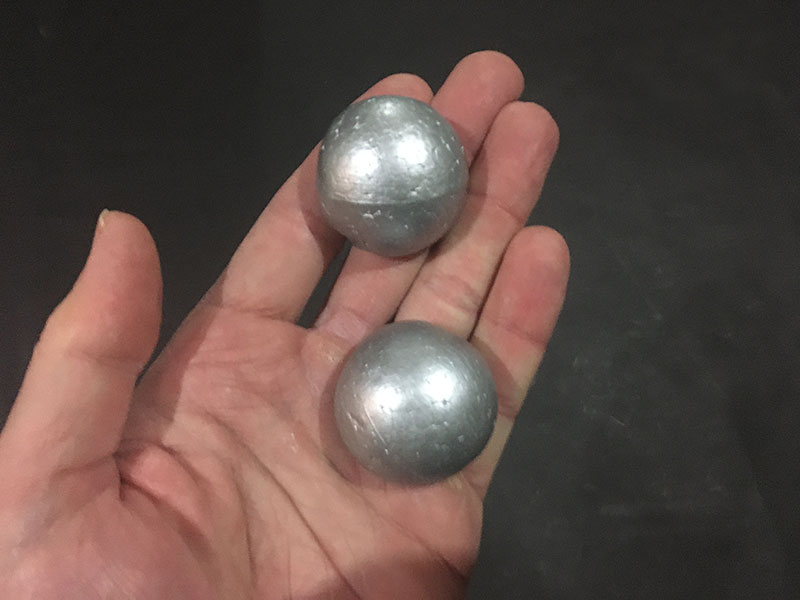
The beam still didn't have enough detail to my liking. It was missing those classic RIVETS that you see in many old photos. The challenge was how to replicate that look. I thought about buying metal rivets and sawing the extentions off. This seemed like too much work. I happened to be strolling down the "craft aisle" of Dollarama Store, when I had an "AHA MOMENT". I saw these small styrofoam balls being sold in packets. I figured that I could easily cut them in half, and each half would look like a Rivet. I painted them the same Metallic Grey and then glued them on with heavy duty construction glue.
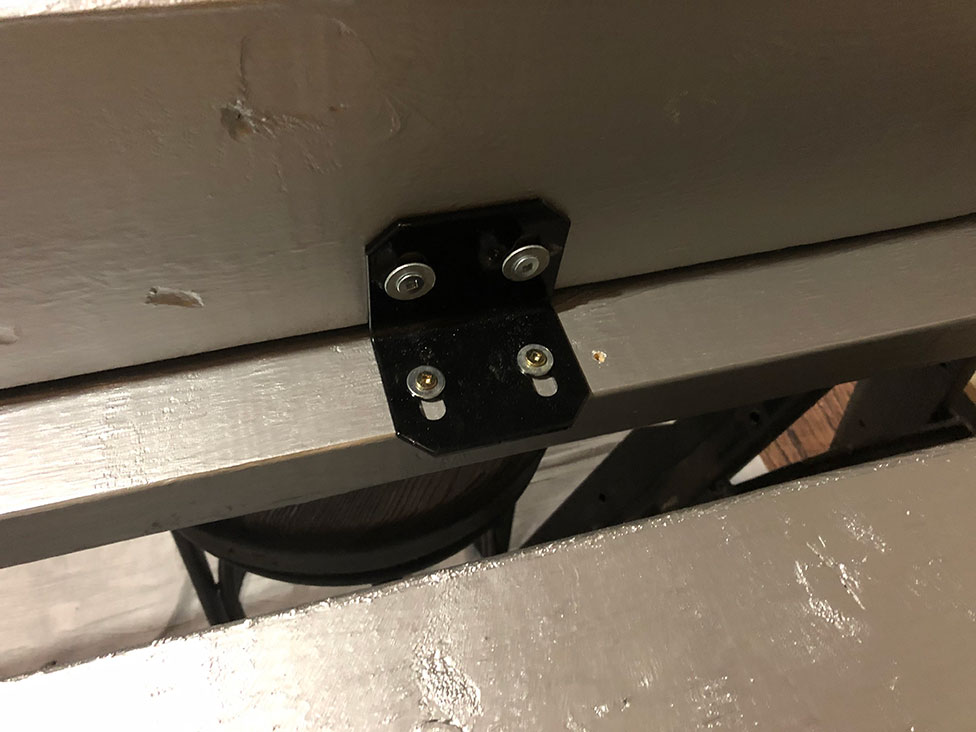
The last thing to do to make this Prop very Safe, was to add some steel Angle-Brackets to the back-side of the beam. This added rigidity to the overall structure and guaranteed that all the wood beams wood stay together as one unified piece.
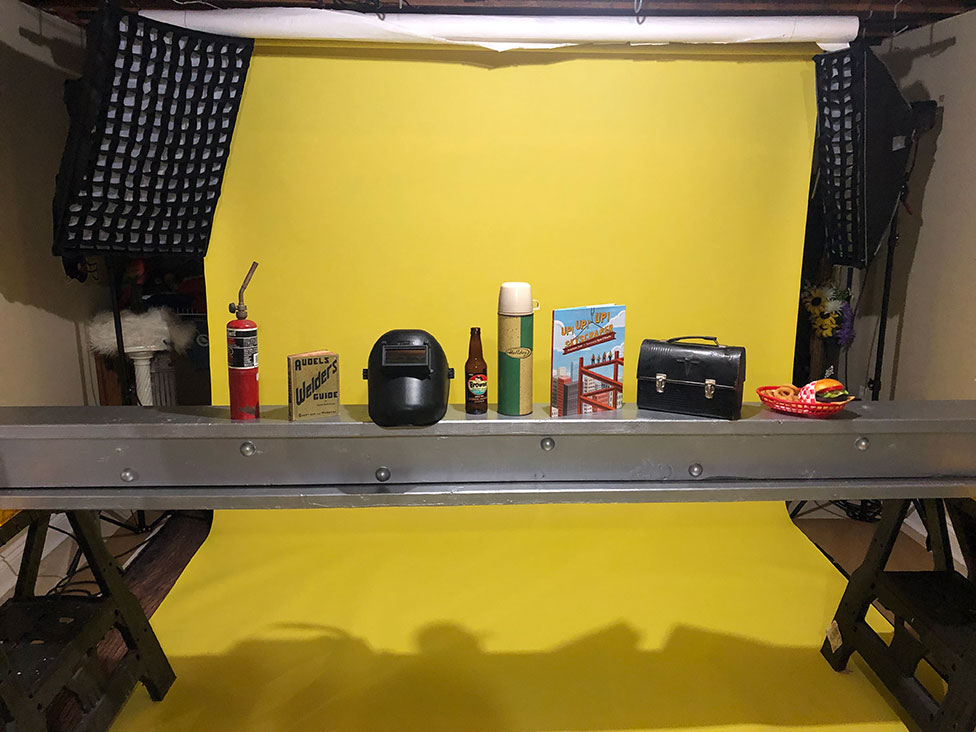
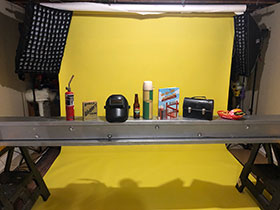
Here was the finished Steel Beam along with some fun Construction related props for my Mom And Me Pinup Session. For the actual shoots, I had this beam sitting on two very sturdy bar stools that were about 3 feet off the ground. I tested the beam myself (I am 200lbs), and I sat and bounced on the middle of the beam, and it was sturdy as a rock. There is something satisfying about creating your own Unique prop from scratch. I think it must be similar to a Chef who makes their own amazing Gourmet Dinner from scratch.
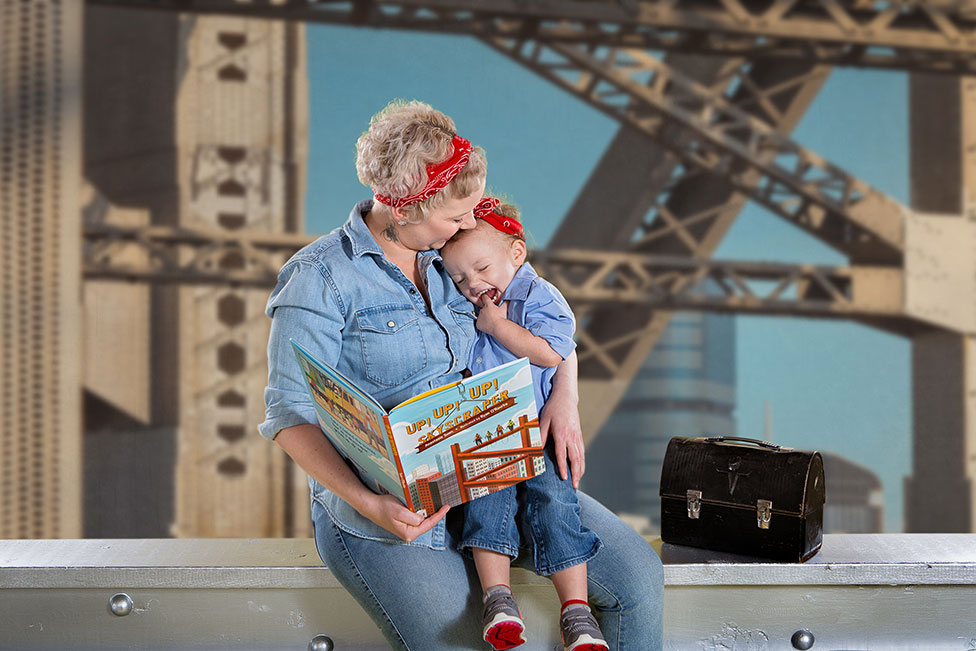
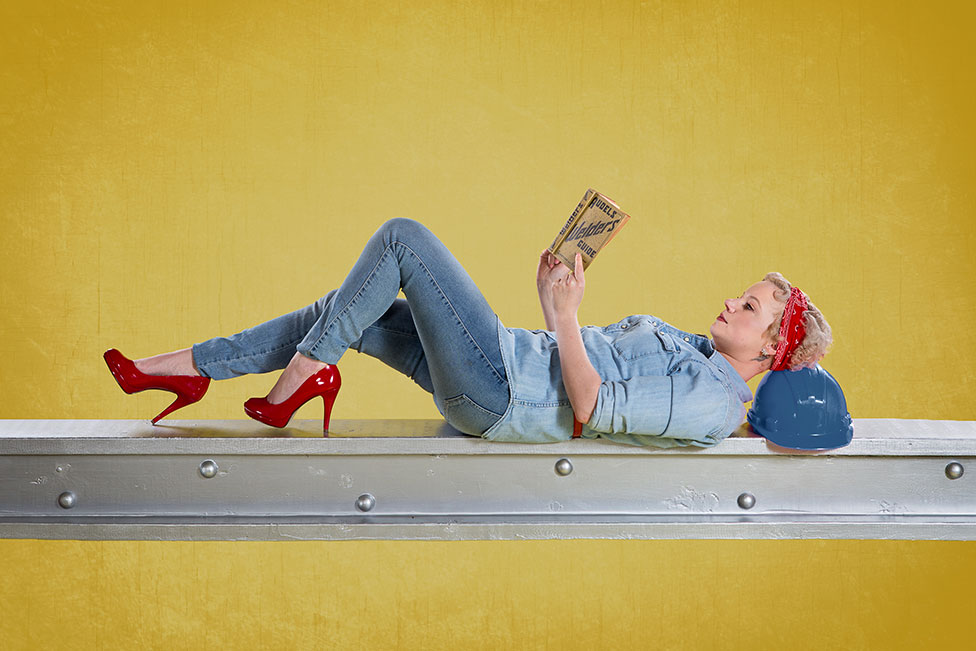
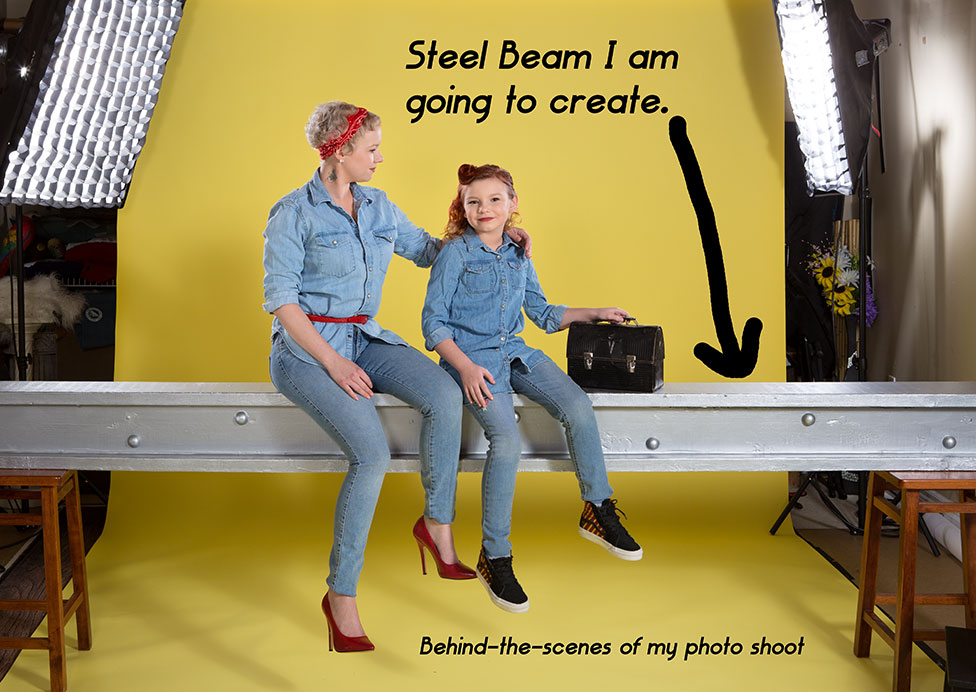
Here are some examples of the "Rosie The Riveter" MOM AND ME Pinup Session. For those of you who don't know who "Rosie The Riveter" is, she is a iconic fictional character from the 1940's. In 1942 Westinghouse Company hired J. Howard Miller to create an inspirational poster for Women, to aid the war effort. This was the famous "We Can Do It" poster showing a women wearing a jeans top / red bandanna and flexing her bicep. Not till the 1980's did this poster later became know as "Rosie The Riveter" - and a symbol of Strong Women and Women Breaking Barriers.
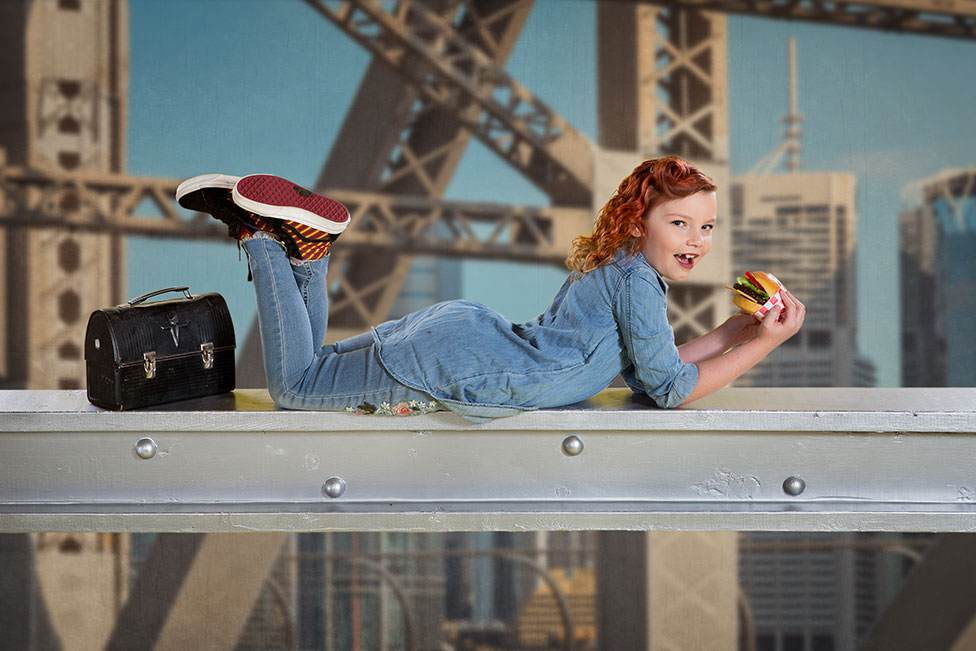
For this MOM And ME session I created two different digital backgrounds for clients. There was the Steel Skyscraper BG and then an alternate Yellow BG, which was the background colour of the original Rosie The Riveter Poster. This session is a great Bonding Experience for Moms and their Kids (can also be for Dads too).
It only took me a few days to build this prop, and I really had a lot of fun creating it from scratch. I am more proud of the client photos, since I actually built the steel beam, instead of somehow digitally creating it. I highly recommend trying to build props for your own unique photo sessions. There is an extra feeling of satisfaction knowing "I did it myself"- or as the poster says - "We Can Do It".
Images/Story submitted by Mark Bilash
Mark Bilash is an Accredited Member of PPOC and holds 4 Accreditations in: Pinup Photography; Studio Portraiture; Boudoir; and Environmentl Portraits. His studio name is Vintage And Vogue Photography and is located in the Winnipeg and Steinbach, Manitoba areas. You can find his work on Social Media (under the studio name) and at his website: www.vintageandvoguephotography.ca.